.png)
When it comes to crypto and mobile, users have historically been forced to choose between security and convenience: either use a hardware wallet that requires carrying multiple devices and complex workflows, or accept the risks of software wallets that expose private keys to countless attack vectors.
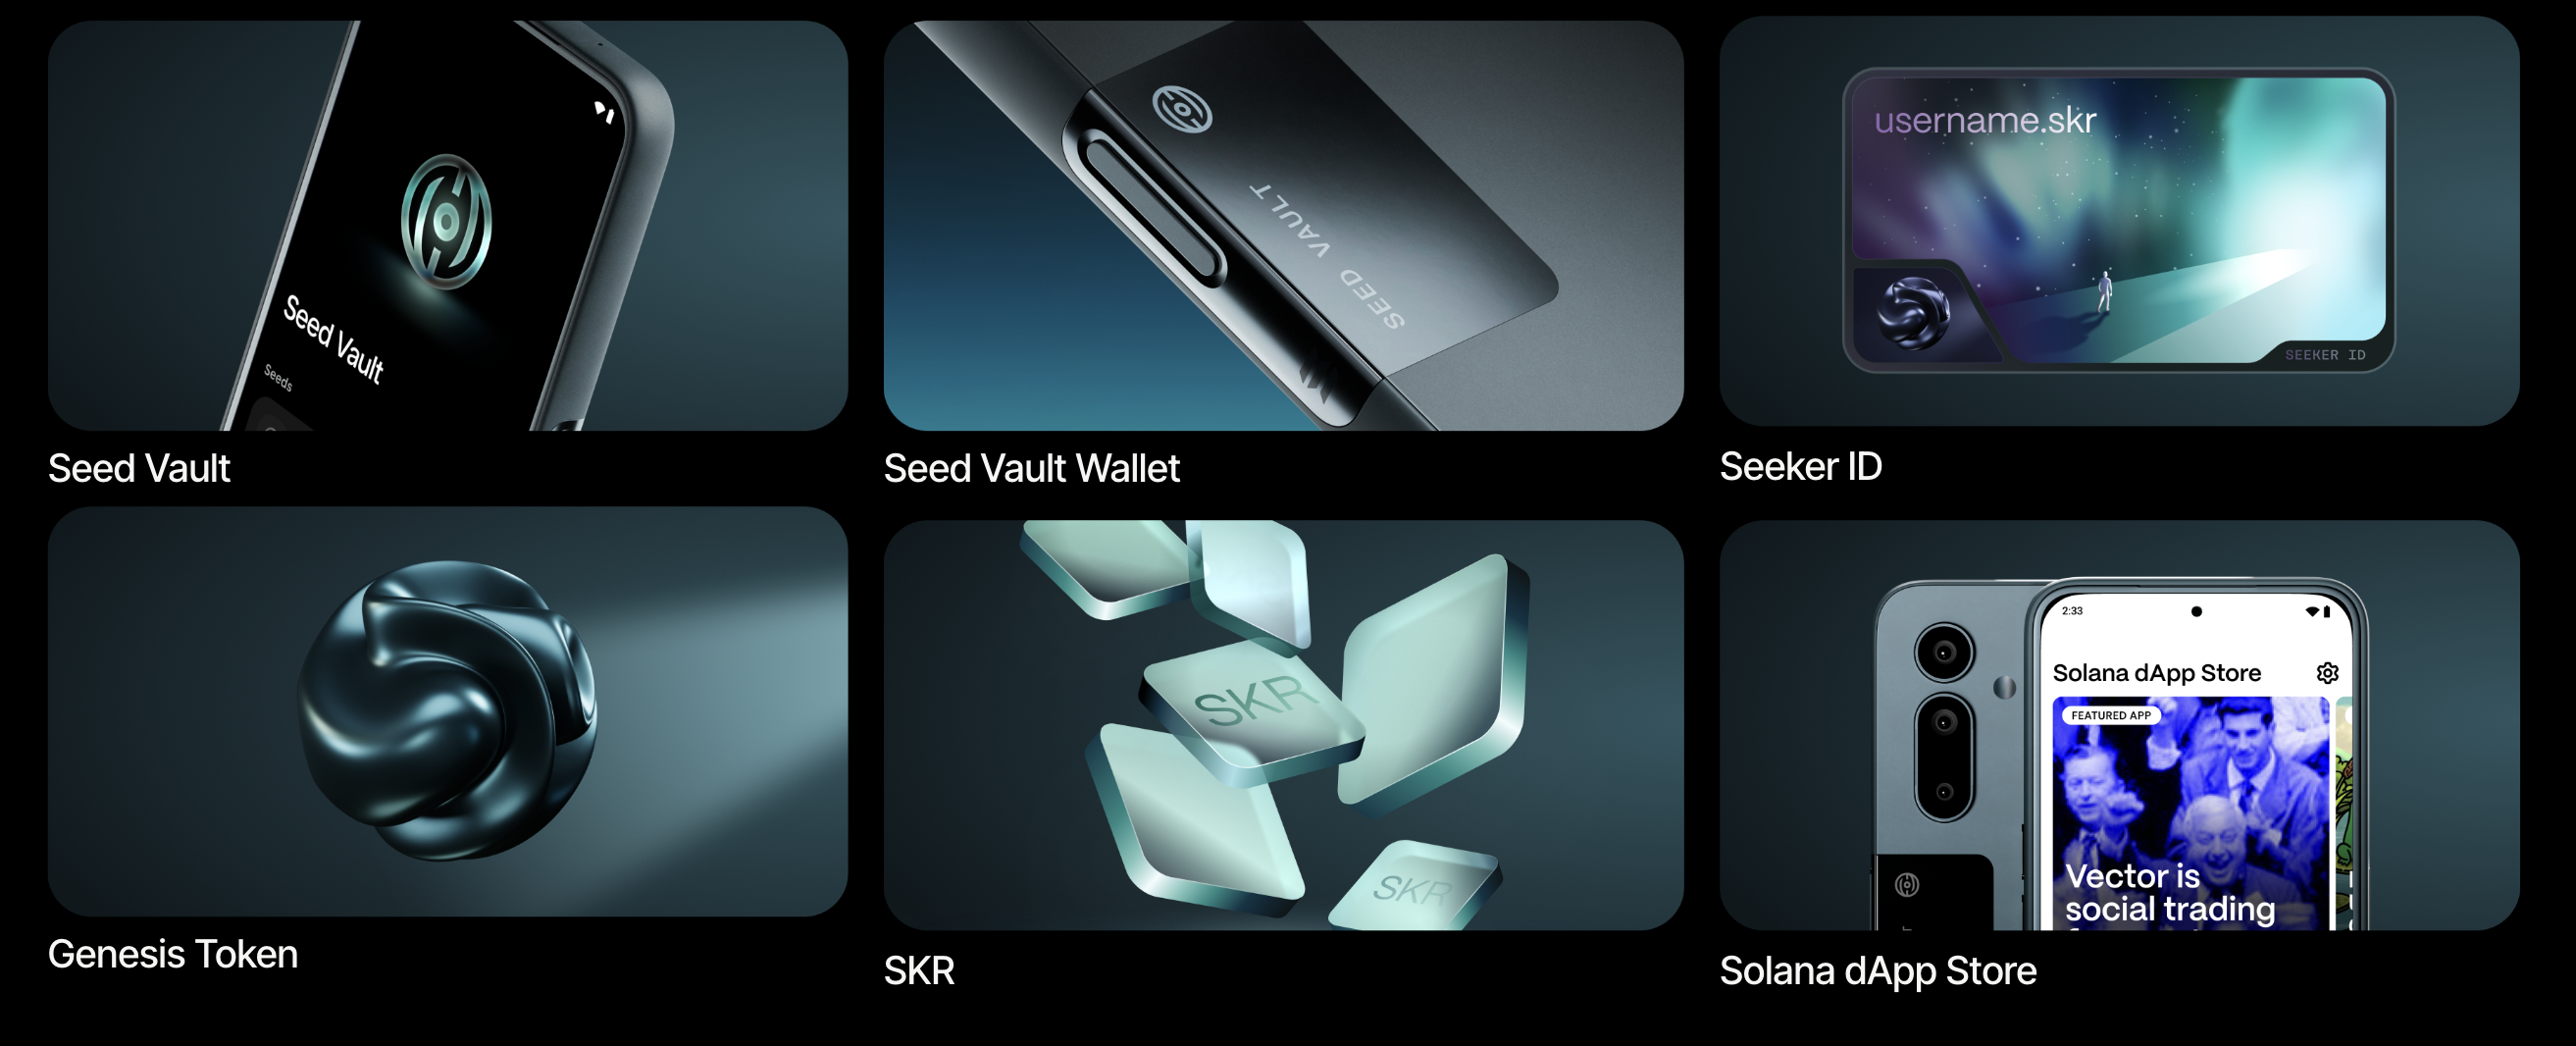
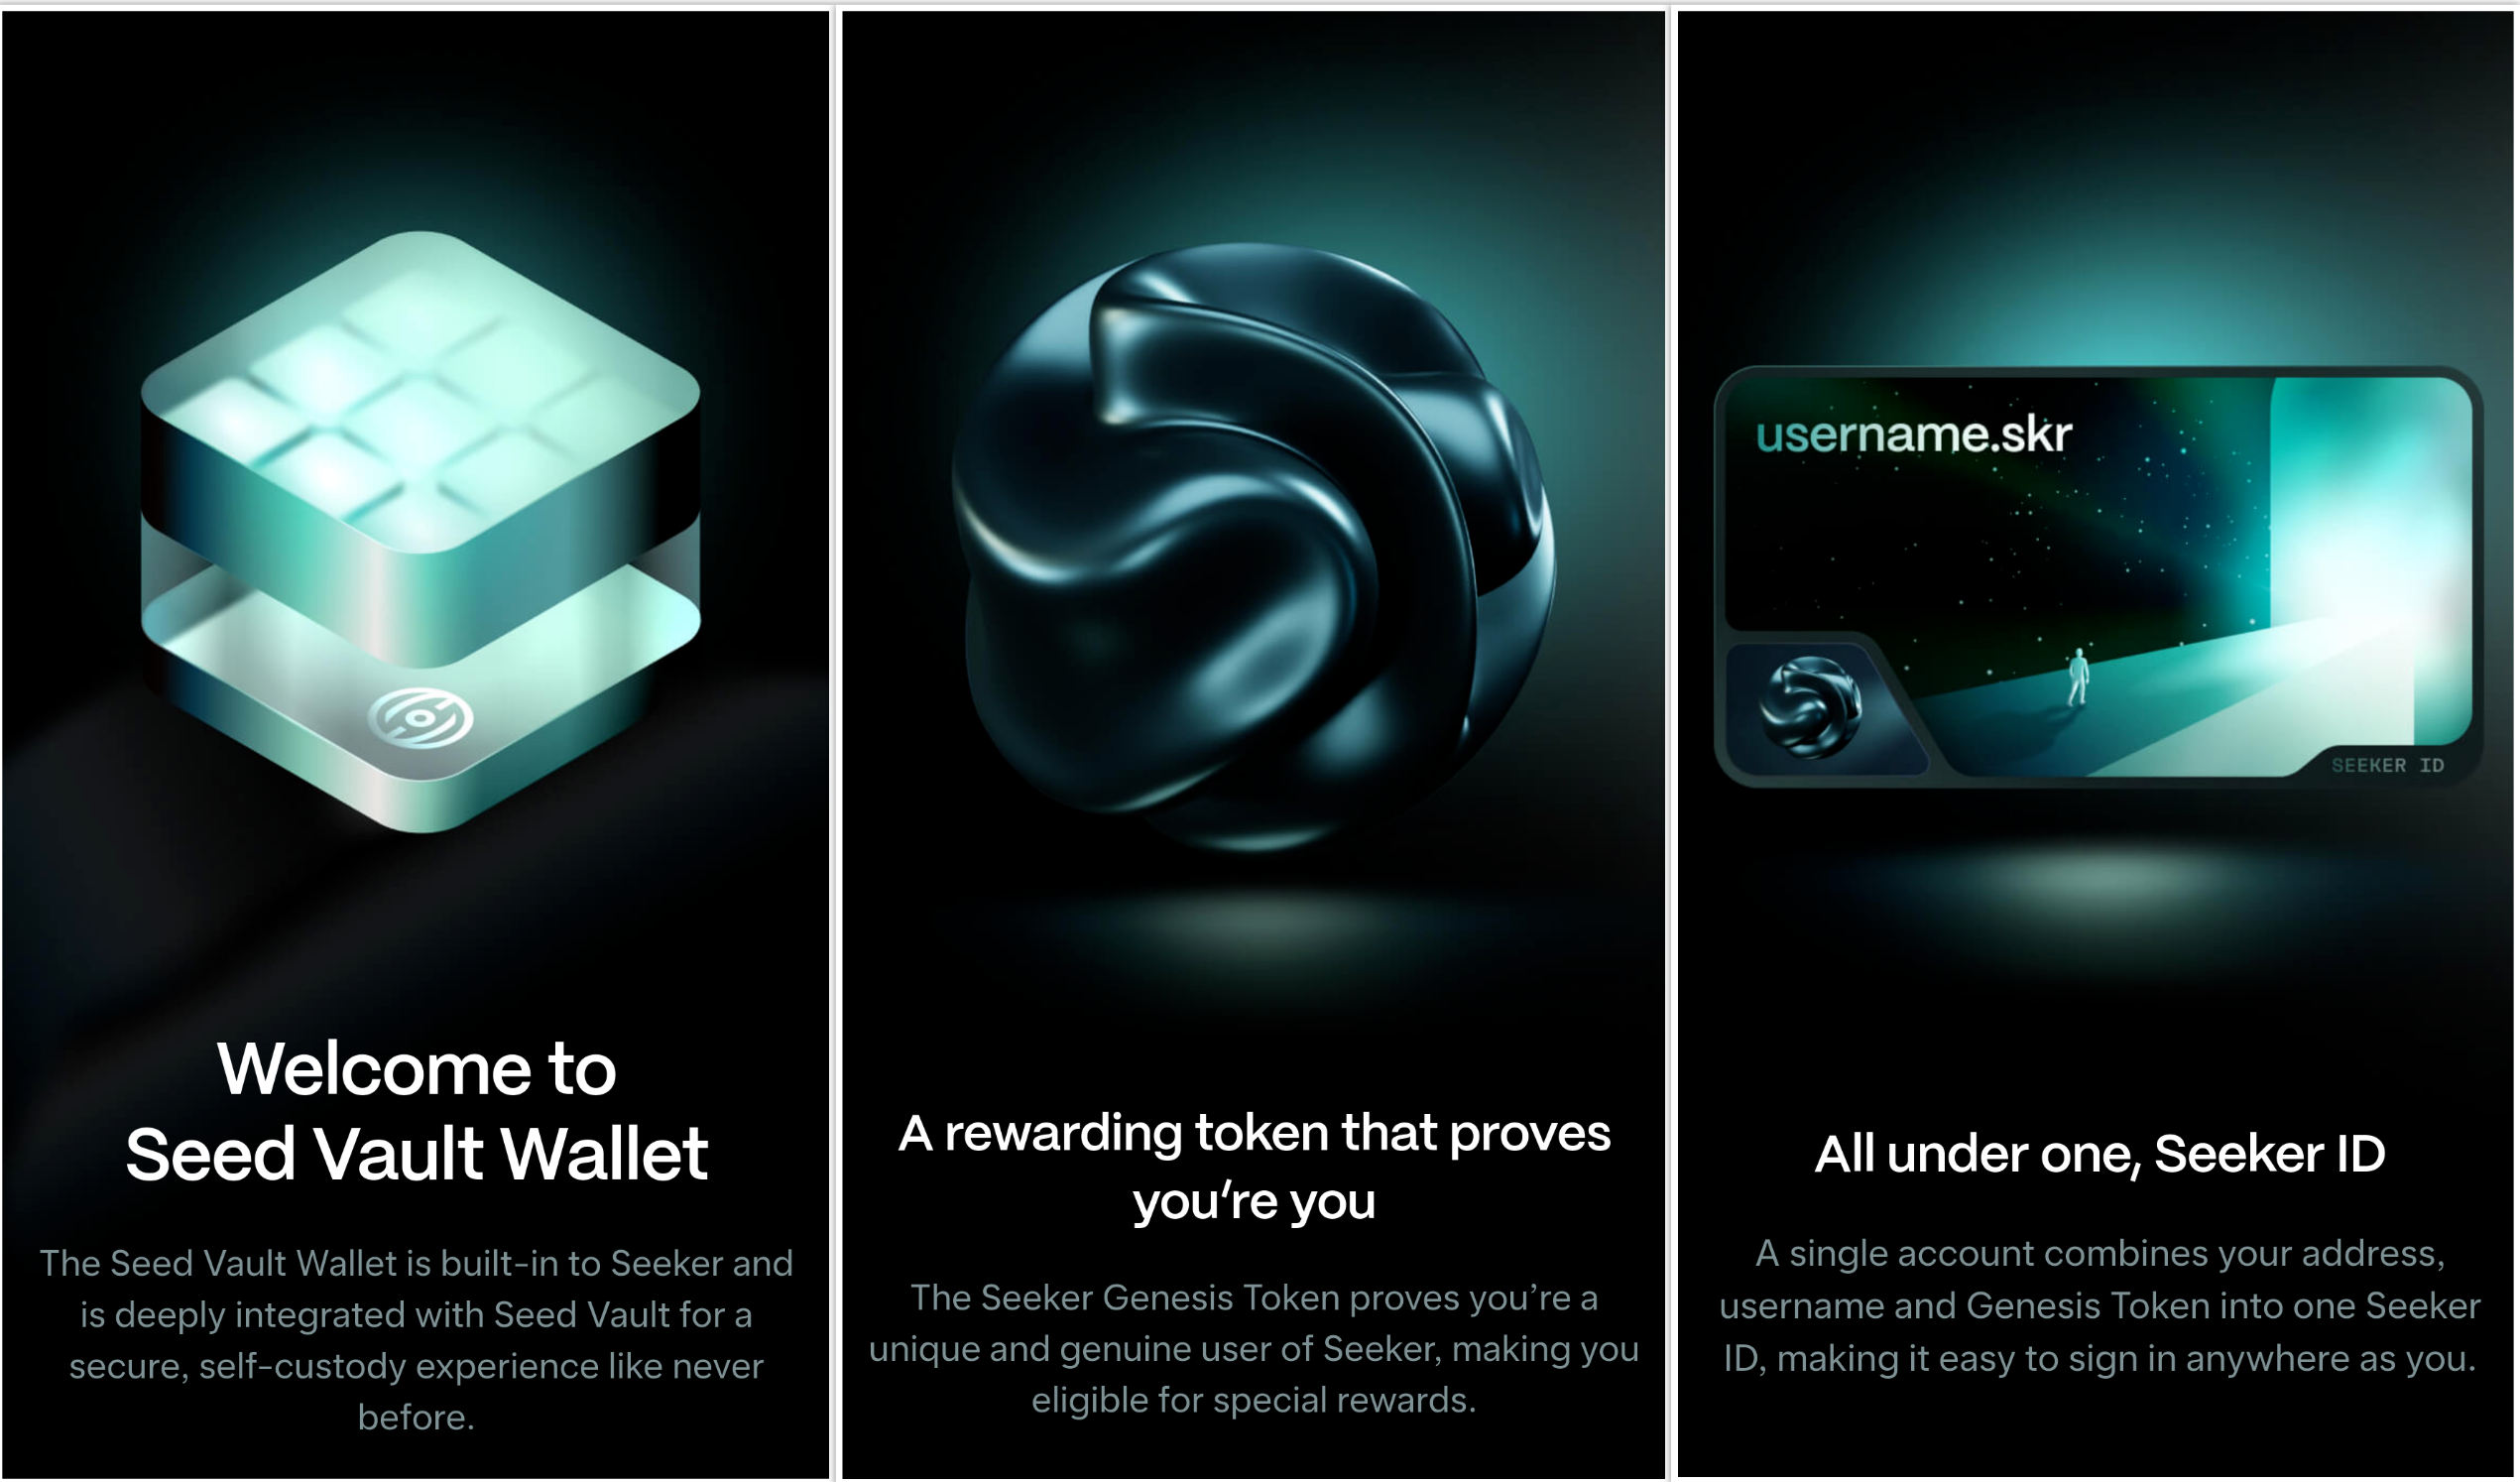
Solana Mobile built the Seed Vault Wallet to solve this problem for the Solana Seeker. To achieve it, we partnered with Solflare — a team that understands Solana users better than anyone — to create a mobile wallet that plugs directly into the Seeker’s Seed Vault hardware implementation. We think it’s the first mobile wallet that provides hardware-level security without sacrificing the seamless experience people expect from their phones.
While any mobile Solana wallet will work with your Seeker, Seed Vault Wallet is the only one that’s built specifically for your device, making it the most secure and seamless way to transact in all of Web3 mobile. And Seed Vault Wallet has one more superpower that you won’t find anywhere else: It’s the home to your Genesis Token, which is the key to unlocking rewards and exclusives throughout the Solana ecosystem.
You’ll find Seed Vault Wallet on your home screen and your app drawer. In this explainer, we’ll go through everything you need to know to set it up and begin exploring Solana on your Seeker.
Understanding the Architecture
Your Seeker contains two components that work together to secure and manage your crypto. This dual architecture means your private keys exist only in tamper-resistant hardware, while you interact through an intuitive mobile interface designed specifically for crypto operations:
Seed Vault Hardware: A dedicated security module integrated to your phone’s secure element that stores private keys in a Trusted Execution Environment. This hardware vault operates independently from Android and remains isolated from all apps and processes on your device.
Seed Vault Wallet App: The software interface that communicates with the Seed Vault hardware. This app handles transactions, displays balances, and connects to Solana applications seamlessly and natively while your private keys never leave the secure hardware environment.
Seed Vault Wallet's Core Features
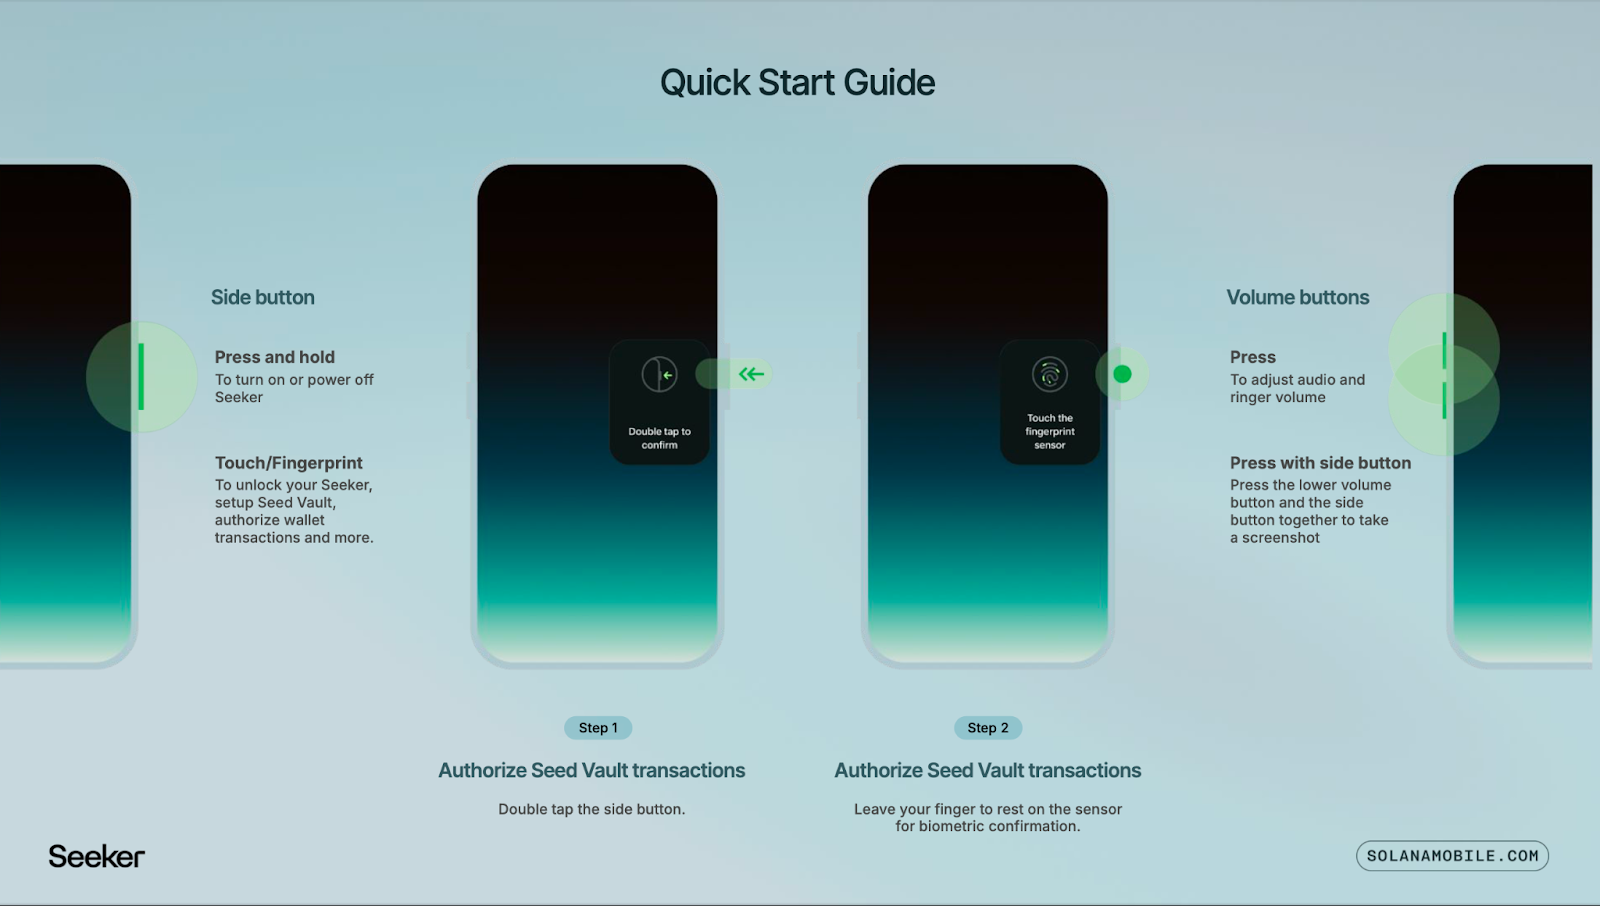
Double-Tap Transactions
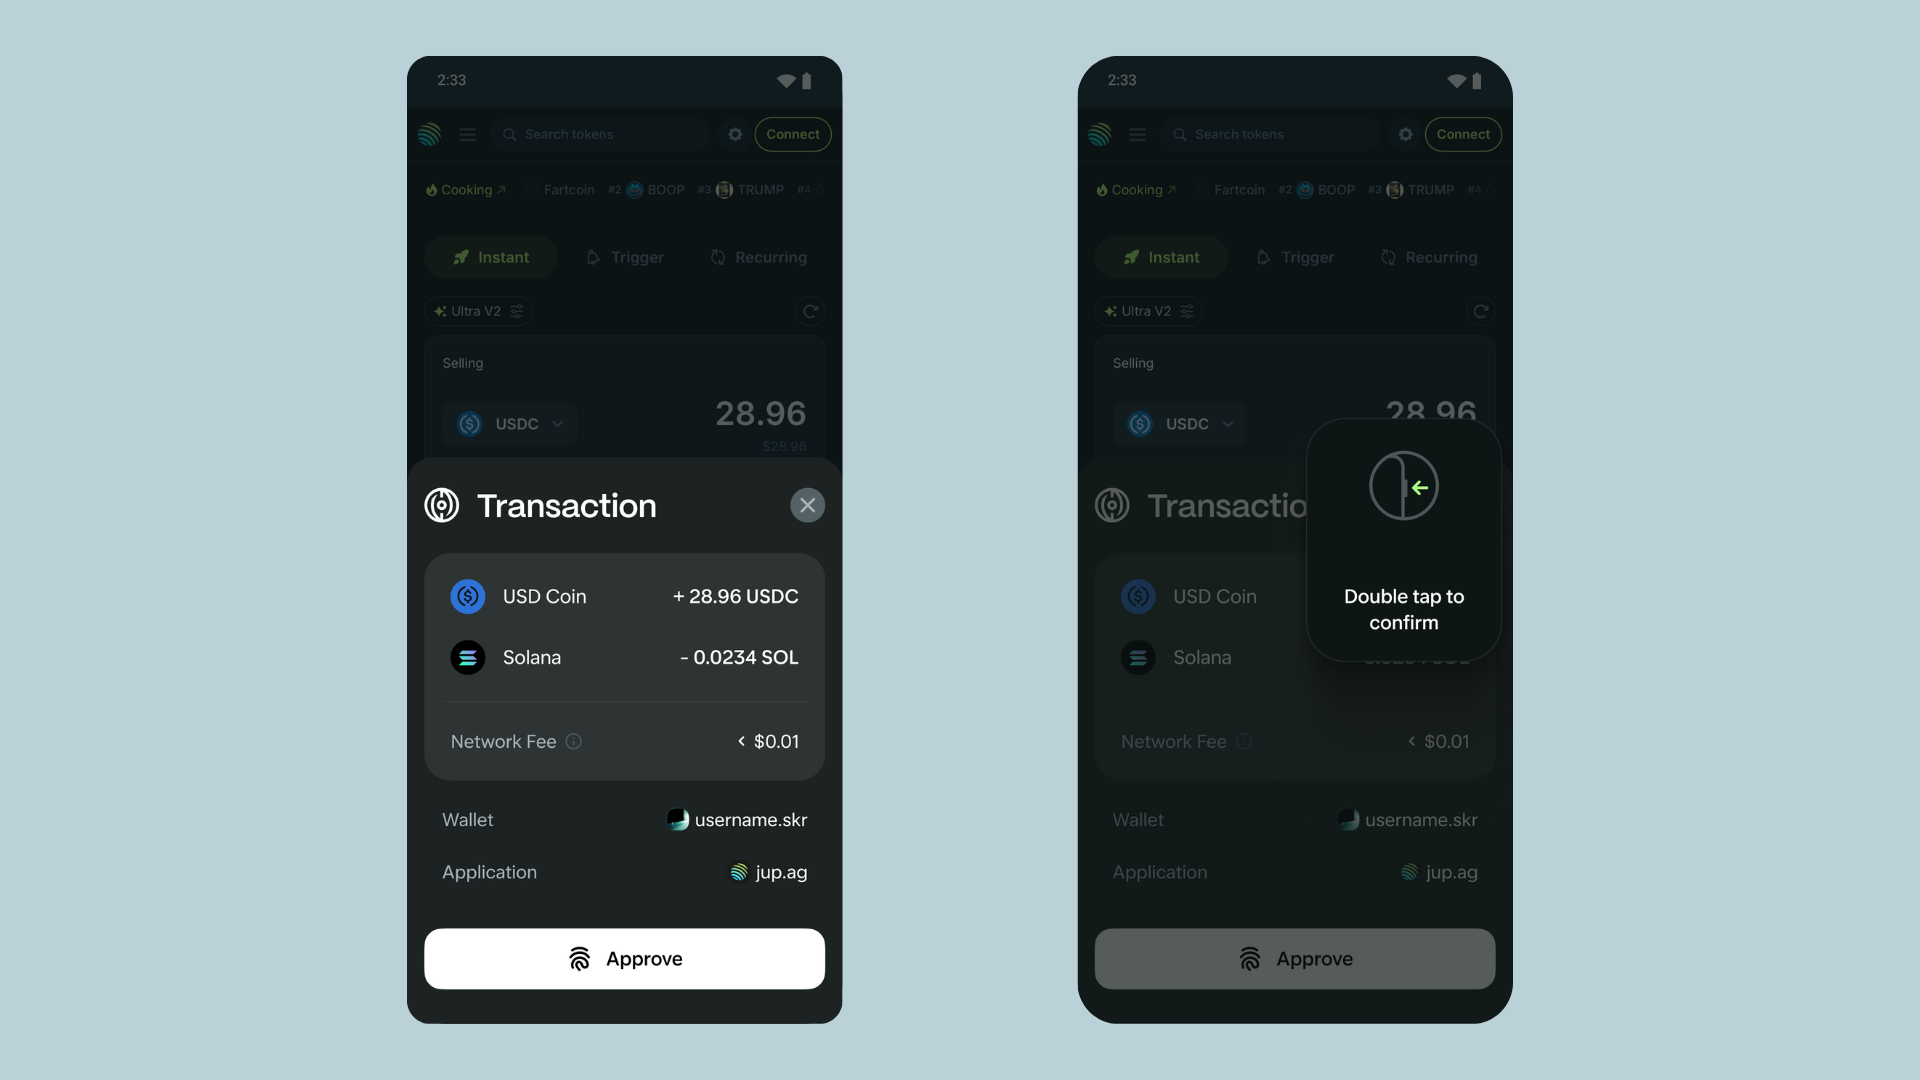
Every Seed Vault Wallet transaction follows the same simple pattern: double-tap the side button, place your finger on the sensor, and confirm. Whether you're swapping tokens, staking SOL, or minting NFTs, the authentication process remains consistent across all Solana applications.
The hardware fingerprint sensor connects directly to the Seed Vault. Your biometric data authorizes transactions at the hardware level, providing security through a familiar mobile gesture.
Fingerprint Authentication
Your registered fingerprint becomes the key to your crypto. The Seed Vault Wallet uses biometric authentication for:
- Wallet access and balance viewing
- Transaction authorization across all apps
- Account recovery and backup operations
- Security settings and configuration changes
The biometric system operates independently of Android's fingerprint features, creating a dedicated crypto authentication layer that works even if your phone's main security is compromised.
Native Solana Integration:
The Seed Vault Wallet connects seamlessly to the broader Solana ecosystem. Your Genesis Token — which lives in your Seed Vault Wallet — provides automatic verification to applications, while your Seeker ID (yourname.skr) replaces complex wallet addresses with human-readable names.
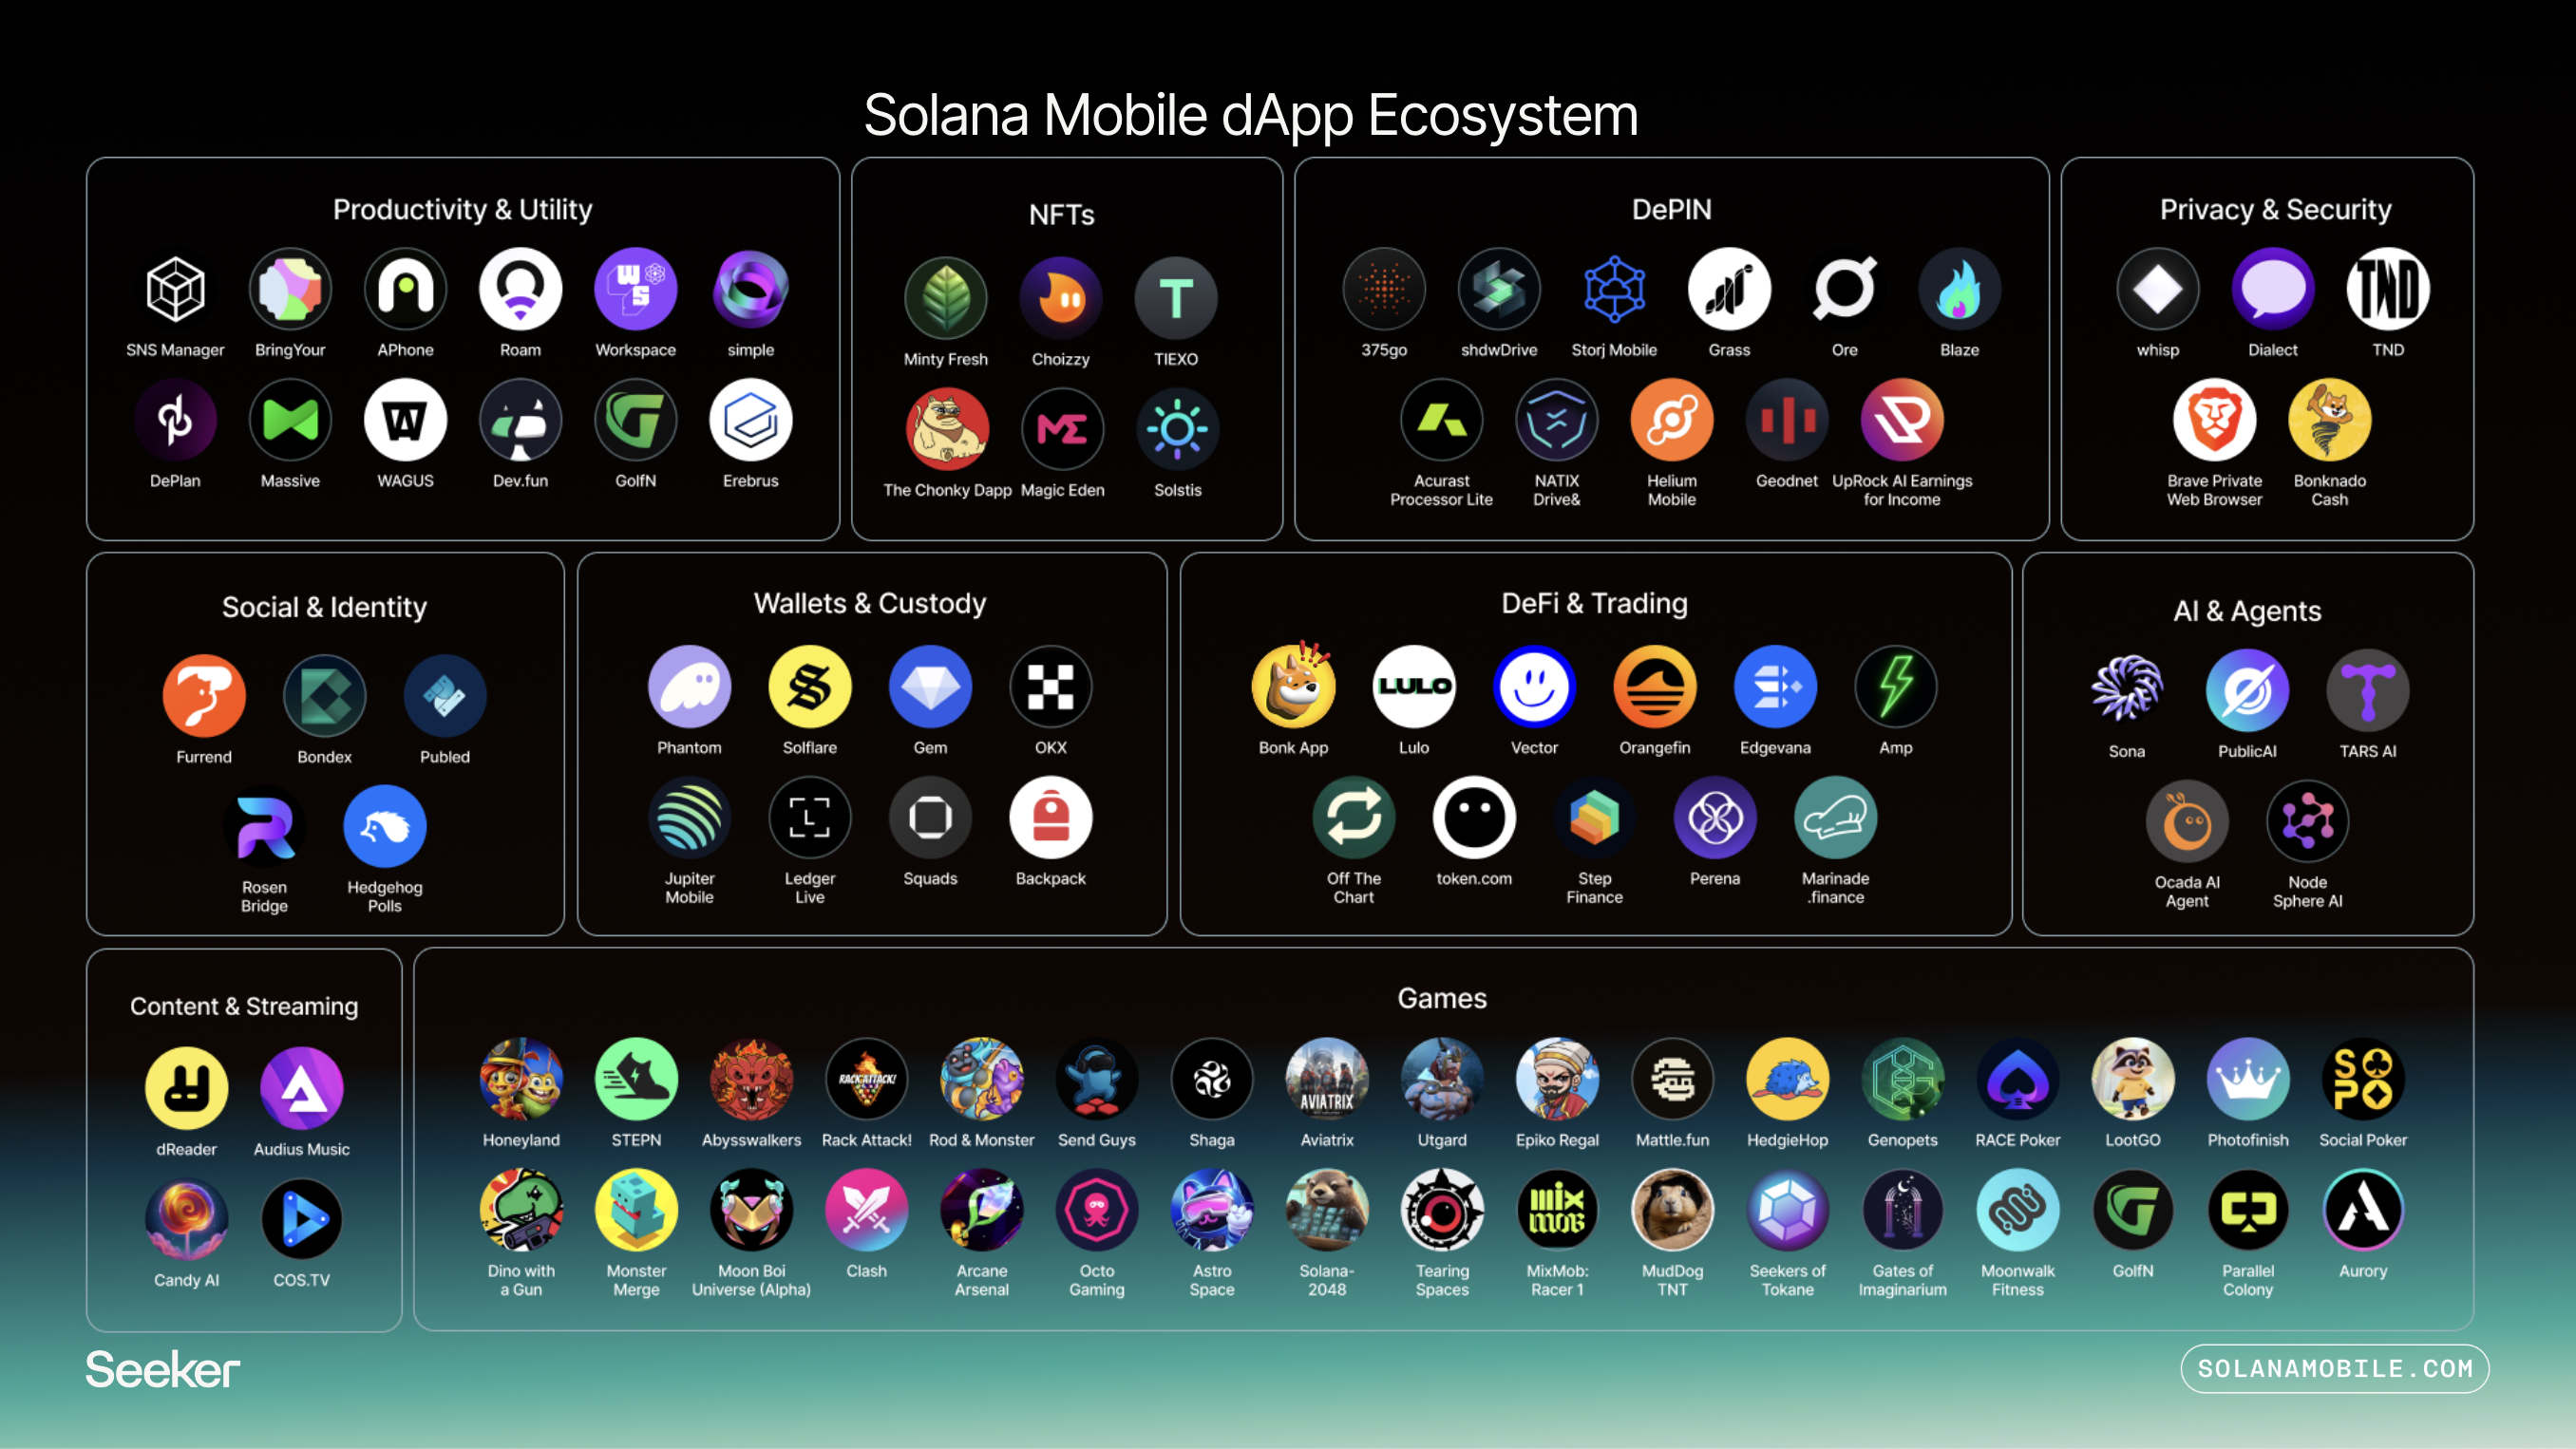
The Seed Vault Wallet automatically handles authentication when you open dApps from the Solana dApp Store. Your Seeker ID and Genesis Token provide instant verification, while the hardware security ensures safe interactions. This seamless connectivity works across DeFi protocols, games, social applications, and DePIN networks. Every transaction flows through the same biometric authentication process regardless of the application type.
Because of this, applications can recognize Seeker users automatically, often providing enhanced features, exclusive access, or improved rewards without requiring additional verification steps.
Getting Started
Wallet Creation
Open the Seed Vault Wallet app from your home screen and choose your setup method:
New Wallet: The app generates fresh private keys directly in the Seed Vault hardware and provides a 12-word recovery phrase. Write this phrase on the included Seed Card and store it securely.
Import Existing: Enter your current Solana wallet's seed phrase to migrate your holdings into the Seed Vault. Your transaction history and associated accounts transfer automatically.
Both options offer a secure setup: private keys stored in dedicated hardware, accessible only through biometric authentication, but a new wallet is the most secure, as the seeds will be freshly generated and only on your Seeker device.
Claim Your Genesis Token and Seeker ID
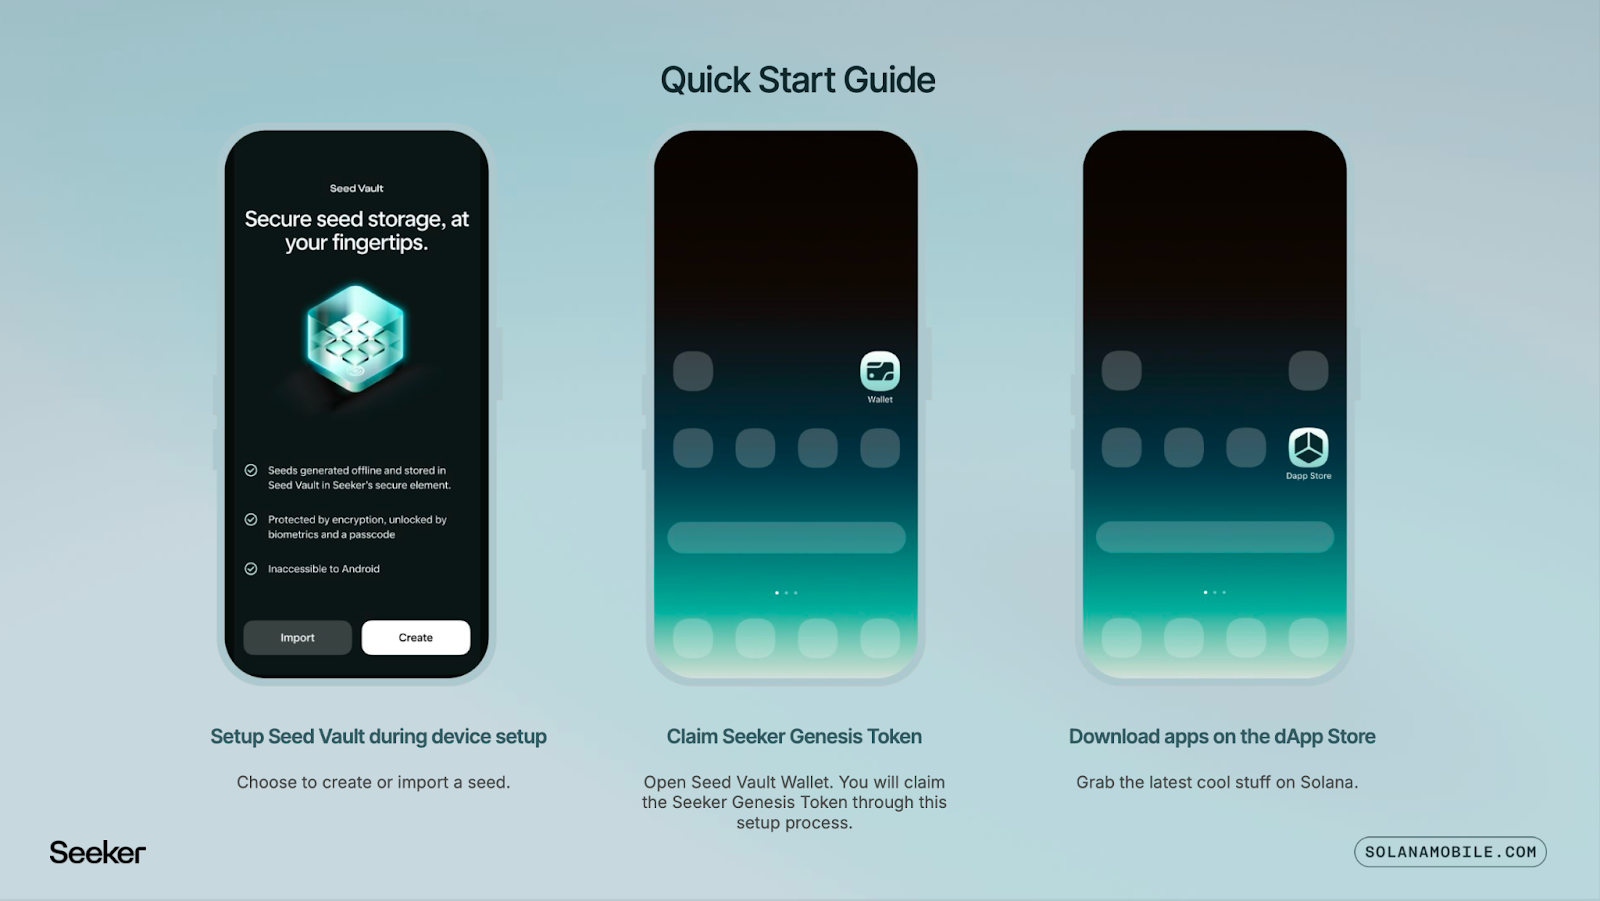
After wallet creation, you'll claim your Seeker Genesis Token — a unique, non-transferable NFT that proves device ownership to applications across Solana. This token unlocks Seeker-specific features and rewards throughout the ecosystem.
You'll also choose your Seeker ID during this process. This human-readable address works across all Solana applications and identifies you as a verified Seeker user to developers and protocols.
Using Seed Vault Wallet
Funding Your Wallet
To get started, you’ll need some crypto in your Seed Vault Wallet.
- Send assets to your .skr address from another wallet
- Use the built-in buy feature in the top-right corner of the Seed Vault Wallet
- Receive payments using your easy-to-remember Seeker ID
Portfolio Management
Once you’ve done that, Seed Vault Wallet displays your complete Solana holdings in a unified interface:
- Real-time token balances and values
- NFT collections with metadata and rarity information
- Transaction history with detailed breakdowns
- Staking positions and reward tracking
Built-in trading features let you swap tokens, purchase crypto, or stake SOL directly — all while maintaining hardware-level key security.
Transaction Security
All onchain operations require explicit authorization through the Seed Vault Wallet interface. When you initiate a transaction in any application, the wallet displays:
- Transaction details and fee estimates
- Recipient addresses and amounts
- Smart contract interactions and permissions
- Security warnings for suspicious activity
Double-tap the side button and authenticate with your fingerprint to approve. The transaction signs within the hardware vault and broadcasts to the Solana network without exposing your private keys.
Seeker Security Features
The Seeker’s security features have a foundation in hardware. Your Seed Vault uses your phone's Trusted Execution Environment — the same secure hardware that protects mobile payments and biometric data. This dedicated processor operates independently from Android, creating an isolated environment for crypto operations. Your private keys never exist outside this secure environment. Even with root access to your phone, malicious software cannot access the Seed Vault contents or monitor your crypto activities.
Recovery and Backup
Your seed phrase provides complete wallet recovery on any Solana-compatible device. However, Seeker-specific features like your Genesis Token and enhanced security remain tied to the hardware. Store your seed phrase securely and separately from your device. While the Seed Vault protects against most attack vectors, physical loss or destruction of your phone requires seed phrase recovery.
The Seed Vault Wallet transforms mobile crypto from a compromise between security and usability into a seamless experience that enhances both. Your private keys remain protected in dedicated hardware while you interact with the full Solana ecosystem through an interface designed specifically for mobile Web3.
What's Next
Next, we’ll walk you through other essential Seeker features like the Genesis Token and the Solana dApp Store, and you’ll be on your way to exploring everything Solana has to offer. In the meantime, you can head to solanamobile.com to learn more about the definitive web3 mobile device.